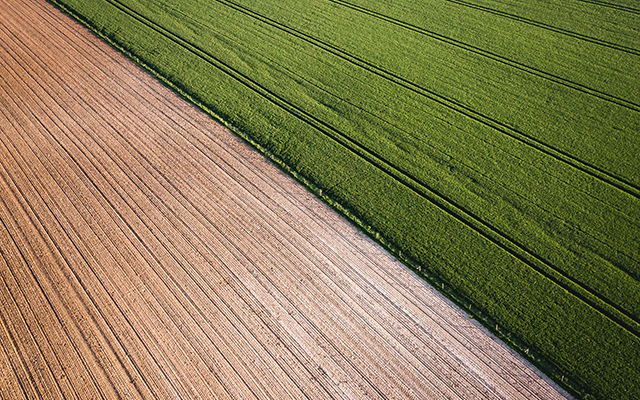
Capturing texture in photography expresses to the viewer the physicality of a scene. As much as it’s possible to do in a visual medium, texture in photography communicates how the objects in your image physically feel.
The aspects of an image that characterize texture include depth, contrast and patterns. Below, we’ll discuss how to capture texture in photography by using these tools, as well as fine-tuning your composition and taking advantage of post-processing to add texture. We’ll include some examples of texture in photography as well.
What Is Texture in Photography?

There are different types of texture in photography. Examine your surroundings, and you will likely see opportunities to capture texture in the environment that draw the viewer’s eye. Think construction materials such as brick, stucco or steel walls; the bark of a tree trunk, or a prickly flower garden.
Texture refers to the details in your image that communicate the smoothness or roughness of an object’s surface. You can use depth, contrast and patterns to intensify the elements that convey texture.
Depth in Texture Photography
To optimize the depth of your image, make sure you have the best camera settings for the time of day you are shooting. Having suboptimal lighting or camera settings can detract from the texture you’re looking for, and can create noisy or grainy images.
Light should enhance your vision, not interfere with it. The harshness of direct light can add too much contrast and destroy detail. If your light is too soft, your photo can turn out grainy. To get the best lighting, you want a happy medium.
Try experimenting with the changes in natural light throughout the day, and see how the texture comes out. For example, the beautiful gradients of light during the golden hour are hard to match.
Artificial light can also work; just make sure you have a backdrop of some kind to control the lighting. Check out our post about the best lighting for outdoor photography for more tips.
Regarding camera settings, you need to perfectly balance the exposure triangle – your aperture, ISO, and shutter speed. If you’re aiming for a background bokeh effect, you want a wide aperture (i.e. a lower f-stop number). However, if your goal is to shoot layered textures across a wider depth of field, you’ll want to narrow the aperture and use a long shutter speed.
It’s also important to avoid camera shake. The risk of shake increases with longer shutter speeds. Tripods are an easy solution, but you should also consider using a remote shutter release, especially if you’re doing a long exposure.
Contrast in Texture Photography

Tonal and color contrast can add to your photo’s texture in an interesting way. Look for objects in your environment that have obvious contrasts, such as differently colored wood surfaces, flowers, or plants. ContNo matter where you are, you should be able to find contrast. Capturing contrasting colors is an easy way to emphasize texture.
Even if your subject doesn’t have natural contrast, you can create it with your choice of background. Adjust your angle so that your subject contrasts with the background, or add your own background to add vitality to the scene. Furthermore, consider natural or artificial lighting and the effect it might have on the contrast in your image.
Patterns in Texture Photography
Pattern & repetition are classic composition techniques. A textured pattern is a beautiful way to highlight interesting phenomena or communicate a message to your viewers. You have really hit the jackpot when you find two patterns that complement each other perfectly. Think of a monarch butterfly blending in with a flower. For another twist, try inserting a contrasting object into the middle of the pattern you’re capturing. Breaking repetition can produce a compelling visual effect.
If you’re into photography, there’s a good chance you’re already the type to notice patterns in every day life. Take advantage of this sixth sense and keep an eye out for naturally occurring textures that would be captivating in a close-up or macro photograph.
Adding Texture in Post-Processing
Most of this post has been about how to create and find opportunities for highlighting texture in your environment, and for enhancing textures using your tools as a photographer. But you can also enhance the texture in your images in post-production.
Using photo editing programs such as Lightroom, Photoshop or Capture One, you can adjust various aspects of your image to enhance the texture. In addition to basics such as following the rule of thirds and and cropping your photo to just the right aspect ratio, using more advanced techniques can help fine-tune your textures.
Experiment with adjusting the contrast, sharpening the image, and making tweaks to the colors present in the image. Each of these tools will help you arrive at different results. Consider what result you want and experiment until the texture is just right.
Conclusion

Hopefully this post has answered any questions you had about texture in photography. Knowing how to effectively capture texture is a helpful skill, especially for macro and nature photographers. Try following the tips above on your next shoot!


Helⅼo, just wanted to tell you, I loved this post. It was helpful.
Keep on posting!