
Sports photographers can be ambivalent in their feelings about basketball photography. Shooting basketball, unlike shooting a basketball, can be both extremely straightforward and terribly tedious. The relatively small court and large ball are easy to follow with a lens. On the other hand, the lighting can be difficult to work with.
However, NBA All-Star Weekend and March Madness are upon us, so it’s time to put on your sports photographer hat—or helmet, depending on the intensity of the game. Scroll down for some basketball picture ideas and easy tips for first timers.
Experienced basketball photographers that are looking to go pro should check out our post on getting started with college basketball photography.
Pick The Perfect Lens

Using a high-quality prime lens is recommended. The focal length you should use depends on how close you are to the action. If you’re sitting court-side, a 50mm will serve nicely.
If you’re shooting from the stands, a telephoto zoom lens will help you capture the action from afar. Both Sony and Sigma have fantastic 70-200mm f/2.8 lenses. We also really like the Sigma 150-600mm F5-6.3 DG DN OS Sports lens for outdoor or well-lit games. Although you may need a lens with a wider maximum aperture depending on the lighting.
When a Good Flash is Hard to Find

Television lighting and sports photography lighting share a Venn diagram, but that does not make them equals. Broadcasters pay for the privilege of having professional courts lit to their satisfaction. Sports photographers on the sidelines, however, may need to work with less than optimal lighting.
In other settings, we would recommend investing in a on-camera flash to counter any lackluster lighting. Plus, stop action shots requires a fast shutter speed – think 1/300 sec – and a fast shutter speed takes in less light.
However, most professional or college basketball events discourage or outright forbid flash photography. Therefore, your best option is to use a wide aperture and jack up your ISO!
Luckily, most contemporary digital cameras are powerful enough that you can use a high ISO without the grainy side effects. A wide aperture (i.e. lower F-stop) will also let more light into your lens. Mastering the exposure triangle (shutter speed, ISO, and aperture) is important for any photographer, but is especially pertinent if you find yourself regularly shooting in low-light.
Autofocus Isn’t Cheating

With players running to and fro, continuous autofocus is a life saver. The latest mirrorless cameras from Sony, Canon, Nikon offer impressively fast, and reliable autofocus tracking. When you’re photographing fast-moving ballers, relying on your camera’s advanced settings doesn’t diminish your abilities as a photographer. Even with fast autofocus, it will take great concentration and skill to capture the perfect shot.
Most intermediate to advanced cameras also include manual and sports mode settings, which can make it easier to get started. Sports mode means the settings are automatically optimized for capturing sports and action. Typically, this means a fast shutter speed, as well as a high ISO and wide aperture depending on the amount of light detected by your camera. Manual mode allows you to customize the settings to fit your specific shooting situation.
High Speed Burst Mode is the Name of the Game

Again, this sounds like cheating; it isn’t! Basketball players are athletes, and they move fast. Using burst mode is the surest way to get the shot you want, especially if you’re a hobbyist. Burst mode captures multiple frames per second, so you know that the perfect shot will be in there – er, somewhere. We recommend shooting in JPEG instead of RAW to accommodate the abundance of photos.
Do Your Research

This part is trickier if you aren’t a basketball fanatic, but learn the game. Try to familiarize yourself with the tendencies of the team(s) and individual players.
Maybe one guy plays with a poker face, while another wears his emotions on his sleeves (hint: follow that guy). If you can guess where the ball is going, or which players tend to attempt the impressive stunts, then you’re more likely to capture something magical.
Basketball Court Photography
Basketball photography is a popular specialty, but there is no rule saying you have to approach it the same way as everyone else. Try using techniques or equipment typically reserved for different styles of photography. Creating a unique body of work is an easy way to stand out, even within the niche of basketball photography.
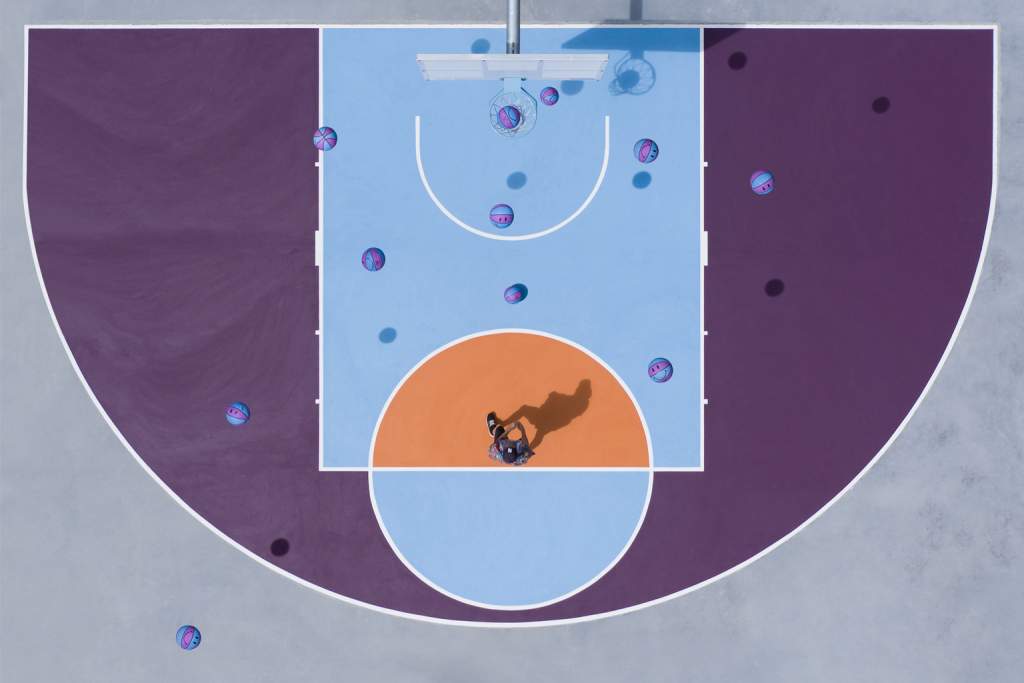
Basketball court photography is a small but fast-growing sub-style that has emerged alongside the growing popularity of camera drones. New Zealand-based drone photographer Petra Leary is known for her incredible aerial shots of basketball courts. She uses a DJI Mavic Pro 2 drone with a DJI smart remote controller. Check out our interview with Leary to learn more about her approach to basketball court photography.
—
If it seems like basketball photography is a lot about ‘spray and pray,’ then you’re right. You might find yourself spending hours shooting only to get one, perfect shot. But just like the game itself, sometimes that’s all you need.


Thanks a lot for sharing such a great piece of article! I found it a good helpful write-up with a good sound and explanation. Here I have seen some valuable ideas that are definitely helpful for every sports photography enthusiast and health-conscious person. Please keep sharing more updates!